從這一節開始我們將介紹如何變換欄位所使用的元件。切換編輯元件我們都在RWDDataForm或者RWDDataGrid的Columns屬性編輯器中的Editor中修改。
Step1>
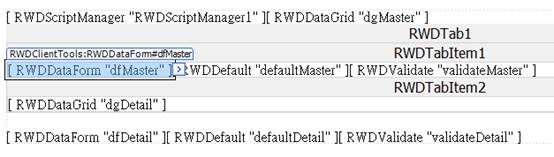
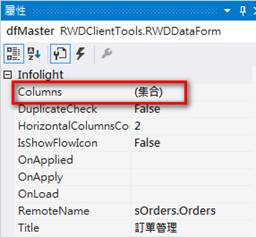
首先我們先示範使用DateBox元件。打開rOrders表單,找到dfMaster這個DataForm元件,點開columns屬性。
Step2>
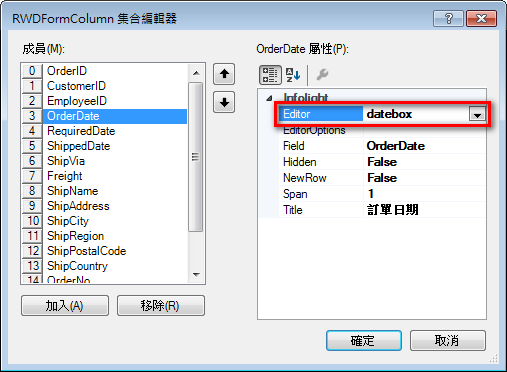
找到OrderDate訂單日期欄位,將Editor類型設定為datebox,這樣這個欄位就可以以日期元件顯示了。
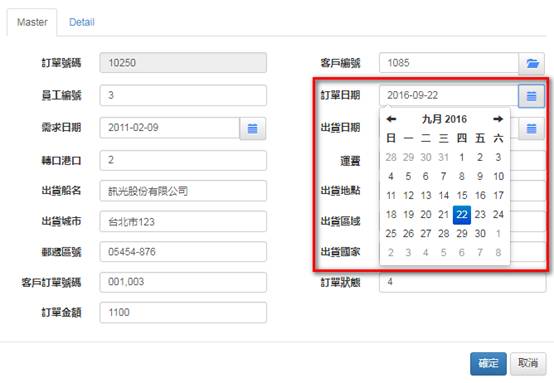
Step3>
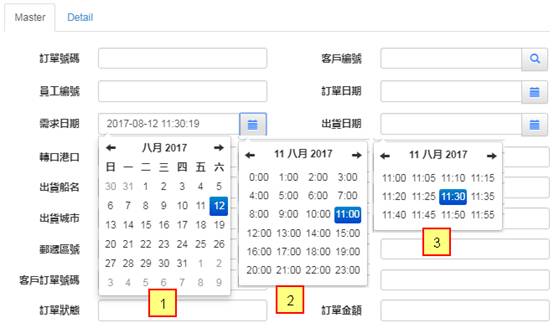
接著我們示範使用DateTimeBox元件。在dfMaster這個DataForm元件中找到RequiredDate需求日期欄位,將Editor類型設定為datetimebox。
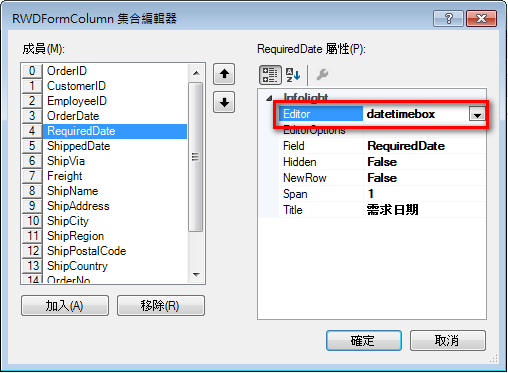
Step4>
EditorOptions屬性編輯器進入,可以設置Format日期格式;MinView屬性為日期時間選擇器,預設為hour代表可以選到時間,也可以設置month,則跳過時間選擇;ReadOnly屬性控制元件是否唯讀。

MinView屬性可接受的值:
·
0 or 'hour' for the hour view
·
1 or 'day' for the day view
·
2 or 'month' for month view (the default)
·
3 or 'year' for the 12-month overview
·
4 or 'decade' for the 10-year overview. Useful for date-of-birth
datetimepickers.
Step5>
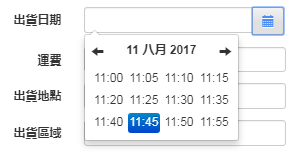
保存後執行觀看一下效果。
Step6>
最後我們示範使用TimeBox元件。在dfMaster這個DataForm元件中找到ShippedDate出貨日期欄位,將Editor類型設定為timebox。
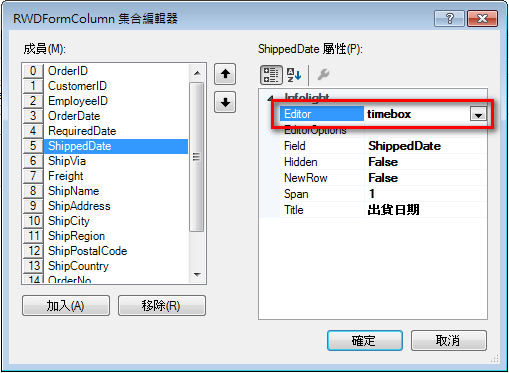
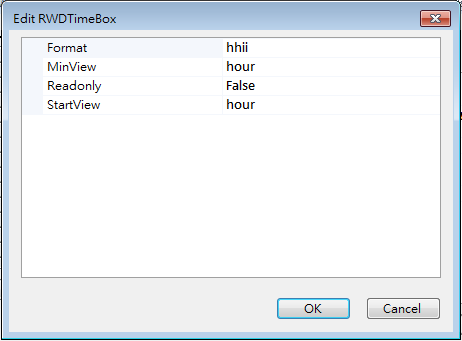
Step7>
EditorOptions屬性編輯器進入,可以設置Format日期格式;MinView屬性為日期時間選擇器,預設為hour代表可以選到時間,也可以設置month,則跳過時間選擇;ReadOnly屬性控制元件是否唯讀;StartView屬性為日期時間選擇器打開之後首先顯示的畫面。
MinView屬性/StartView屬性可接受的值:
·
0 or 'hour' for the hour view
·
1 or 'day' for the day view
·
2 or 'month' for month view (the default)
·
3 or 'year' for the 12-month overview
·
4 or 'decade' for the 10-year overview. Useful for date-of-birth
datetimepickers.
Step8>
保存後執行觀看一下效果。