準備工作
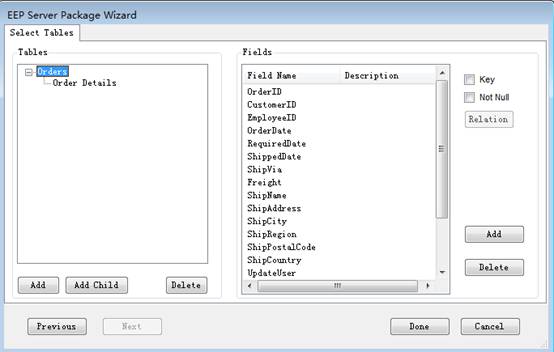
首先在EEP中使用Wizard產生一個客戶表的Server端(Model),sOrders為模組名稱(會被Build成sOrders.DLL),這個商業邏輯會自動存取Orders訂單表與下達Insert/Delete/Update的指令。
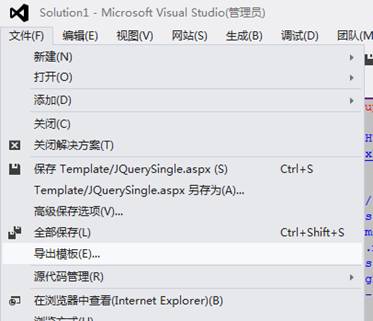
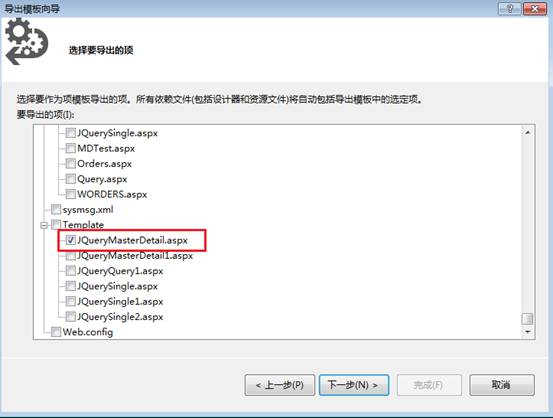
接著,來導出Single的模板,在vs的“文件-〉導出模板…”
導出模板是選擇項模板,同時在下面的下拉框中選擇JQWebClient
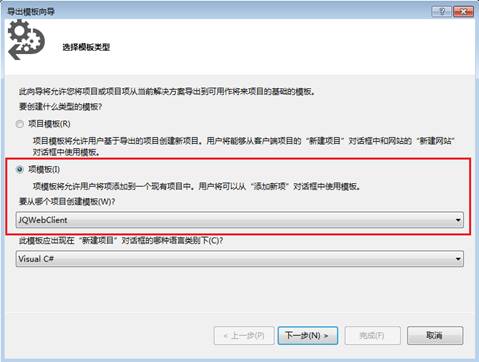
並選擇出需要導出的模板對應的aspx
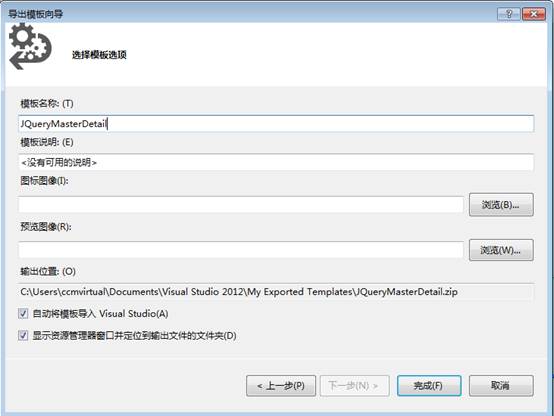
同時,將這個模板的名稱命名為JQueryMasterDetail
設計
Step1>
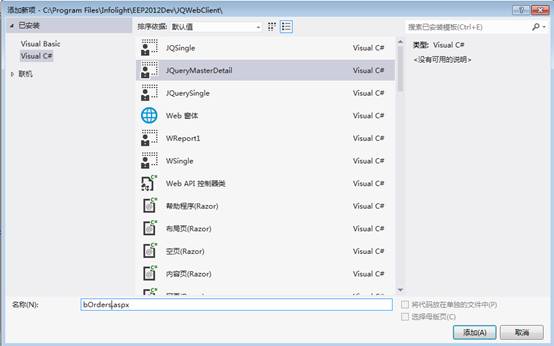
首先,在MyPage上右鍵添加-〉添加新項…

Step2>
以前面新建的JQueryMasterDetail為模板,產生一個名為bOrders的網頁。
Step3>
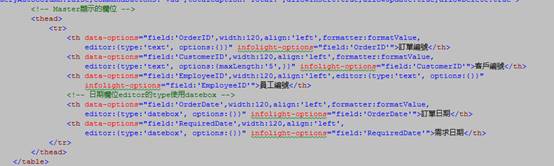
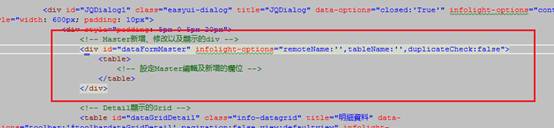
在新建的網頁中,首先找到綠色註解為Master所在的Grid部分,如下圖紅色框所在區域,在這個區域中用於設定顯示master資料的Grid。

Step4>
第一步,來設定這個grid所在的div的remoteName以及tableName,remoteName為server工程的名稱.所要連接的InfoCommand的id,tableName為所連接的infoCommand的id

Step5>
在綠色註解為master顯示的欄位下方,為這個grid添加需要顯示的欄位,添加程式如下:
<thead>
<tr>
<th data-options="field:'OrderID',width:120,align:'left',formatter:formatValue,
editor:{type:'text', options:{}}"
infolight-options="field:'OrderID'">訂單編號</th>
<th data-options="field:'CustomerID',width:120,align:'left',formatter:formatValue,
editor:{type:'text', options:{maxLength:'5',}}"
infolight-options="field:'CustomerID'">客戶編號</th>
<th data-options="field:'EmployeeID',width:120,align:'left',editor:{type:'text',
options:{}}"
infolight-options="field:'EmployeeID'">員工編號</th>
<!-- 日期欄位editor的type使用datebox -->
<th data-options="field:'OrderDate',width:120,align:'left',formatter:formatValue,
editor:{type:'datebox', options:{}}"
infolight-options="field:'OrderDate'">訂單日期</th>
<th data-options="field:'RequiredDate',width:120,align:'left',
editor:{type:'datebox',
options:{}}"
infolight-options="field:'RequiredDate'">需求日期</th>
</tr>
</thead>
Step6>
接下來就來設定用來新增、修改及顯示Master資料的那個div,找到對應的id為dataFormMaster的div,在它下方的table中將設定master編輯資料的具體欄位
Step7>
依然,還是先要對這個div設定資料來源,如前面設定grid一樣,設置remoteName以及tableName

Step8>
接著,來填補下面的Form中所需要顯示的欄位
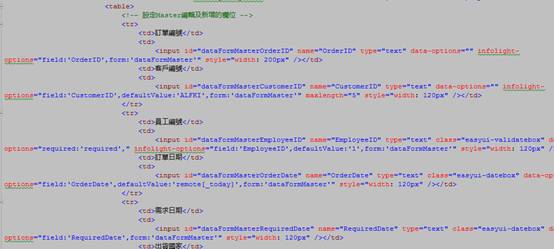
<tr>
<td>訂單編號</td>
<td>
<input id="dataFormMasterOrderID" name="OrderID" type="text" data-options="" infolight-options="field:'OrderID',form:'dataFormMaster'" style="width: 200px" /></td>
<td>客戶編號</td>
<td>
<input id="dataFormMasterCustomerID" name="CustomerID" type="text" data-options="" infolight-options="field:'CustomerID',defaultValue:'ALFKI',form:'dataFormMaster'" maxlength="5" style="width: 120px" /></td>
</tr>
<tr>
<td>員工編號</td>
<td>
<input id="dataFormMasterEmployeeID" name="EmployeeID" type="text" class="easyui-validatebox" data-options="required:'required'," infolight-options="field:'EmployeeID',defaultValue:'1',form:'dataFormMaster'" style="width: 120px" /></td>
<td>訂單日期</td>
<td>
<input id="dataFormMasterOrderDate" name="OrderDate" type="text" class="easyui-datebox" data-options="" infolight-options="field:'OrderDate',defaultValue:'remote[_today]',form:'dataFormMaster'" style="width: 120px" /></td>
</tr>
<tr>
<td>需求日期</td>
<td>
<input id="dataFormMasterRequiredDate" name="RequiredDate" type="text" class="easyui-datebox" data-options="" infolight-options="field:'RequiredDate',form:'dataFormMaster'" style="width: 120px" /></td>
<td>出貨國家</td>
<td>
<input id="dataFormMasterShipCountry" name="ShipCountry" type="text" data-options="" infolight-options="field:'ShipCountry',form:'dataFormMaster'" style="width: 80px" /></td>
</tr>
<tr>
<td>出貨城市</td>
<td>
<input id="dataFormMasterShipCity" name="ShipCity" type="text" data-options="" infolight-options="field:'ShipCity',form:'dataFormMaster'" style="width: 80px" /></td>
</tr>
Step9>
到前面的步驟結束Master的設定就完成了,下面就來設定Detail的資料。同樣的找到Detail顯示的grid的部分,如下圖:

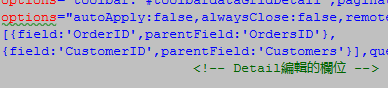
Step10> 首先設定dataGridDetail這個table的資料源,這裡和Master設定有差別的地方,請將tableName設定為所要連接的Detail的那個infoCommand的id

Step11> 接著,找到這個table中的一個parentRelations屬性,用來設定Master和detail的關係欄位,field為Detail中的orderID,parentField為Master中的OrderID。

請注意若關聯有多個欄位,可以寫多個{field:’detail中的欄位’, parentField:’master中的欄位’},同時它們以“,”分割。下面只是為虛擬例子作為參考寫法。
Step12>
接著,找到註解為detail的編輯欄位下,輸入如下的code,為Grid添加欄位。
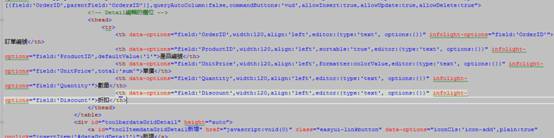
<thead>
<tr>
<th data-options="field:'OrderID',width:120,align:'left',editor:{type:'text',
options:{}}" infolight-options="field:'OrderID'">訂單編號</th>
<th data-options="field:'ProductID',width:120,align:'left',sortable:'true',editor:{type:'text',
options:{}}" infolight-options="field:'ProductID',defaultValue:'1'">產品編號 </th>
<th data-options="field:'UnitPrice',width:120,align:'left',
editor:{type:'text', options:{}}" infolight-options="field:'UnitPrice' ">單價</th>
<th data-options="field:'Quantity',width:120,align:'left',editor:{type:'text',
options:{}}" infolight-options="field:'Quantity'">數量</th>
<th data-options="field:'Discount',width:120,align:'left',editor:{type:'text',
options:{}}" infolight-options="field:'Discount'">折扣</th>
</tr>
</thead>
Step13>
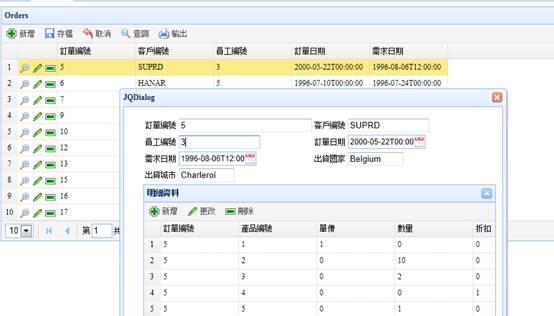
這樣設定完成后,MasterDetail的網頁就設定完成了。接著,將其在EEPManager->System->SecurityManager中添加新的Menu,並給予權限
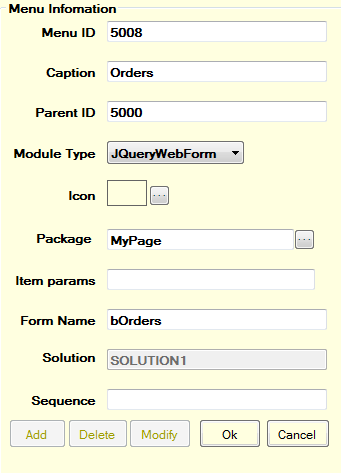
Step14>
最後,通過Logon.aspx右鍵滑鼠,找到在瀏覽器中查看的選項,登入后來瀏覽網頁。